Network Printer Connection Information for MacBook via AirPrint
Office-specific Information
- For agents in Appleton and Mount Horeb, contact your Office Admin for assistance connecting to the office copier.
- For agents in Eau Claire (Altoona), please contact the Affiliated Helpdesk directly for assistance connecting to the office copier.
- Agents in all other offices should follow these instructions to connect to the office copier.
General Information
If one of our office copiers is replaced OR you've recently upgraded your MacBook to the latest operating system, you may need to remove the old copier from your MacBook first and then add the new one before you will be able to print. Removal instructions are provided at the bottom of this page.
Adding a Printer to a MacBook
1. Be sure the MacBook is connected to the office WiFi.
2. Click the Apple Menu in the top left corner and choose System Settings, or System Preferences on older Macs.
3. Search for 'Printers and Scanners' in the left column, then click 'Add Printer.'
4. Your printer should pop up in the list. Click the printer and then click 'Add.'
Removing a Printer
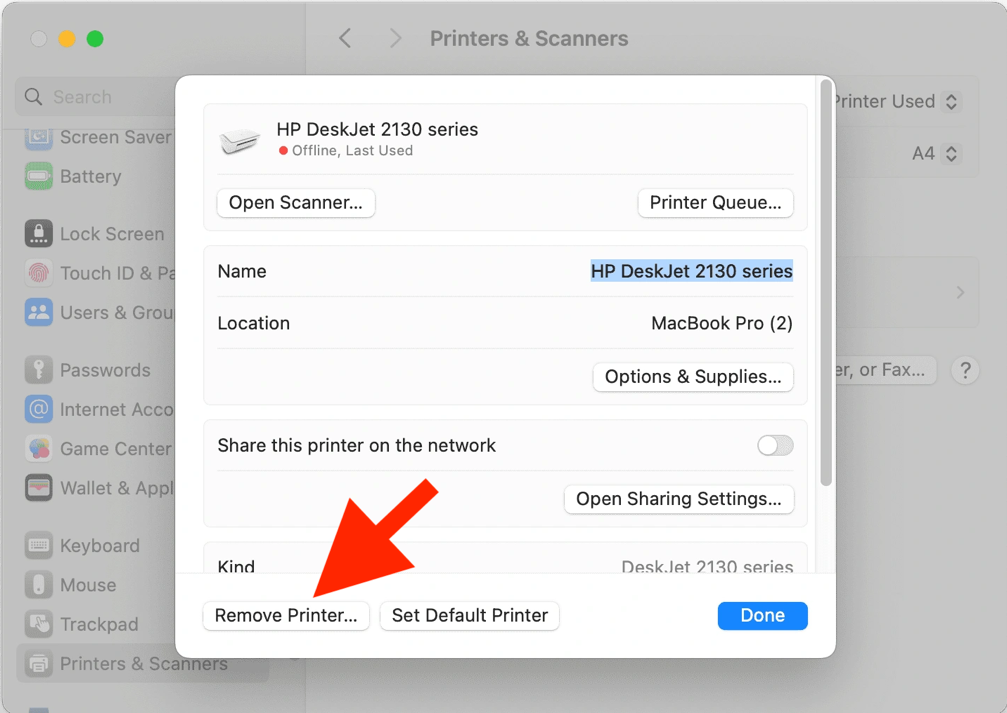
To remove a printer from your MacBook, open the printer system settings page and click then printer once to open printer settings. Then, click the "Remove printer' button.
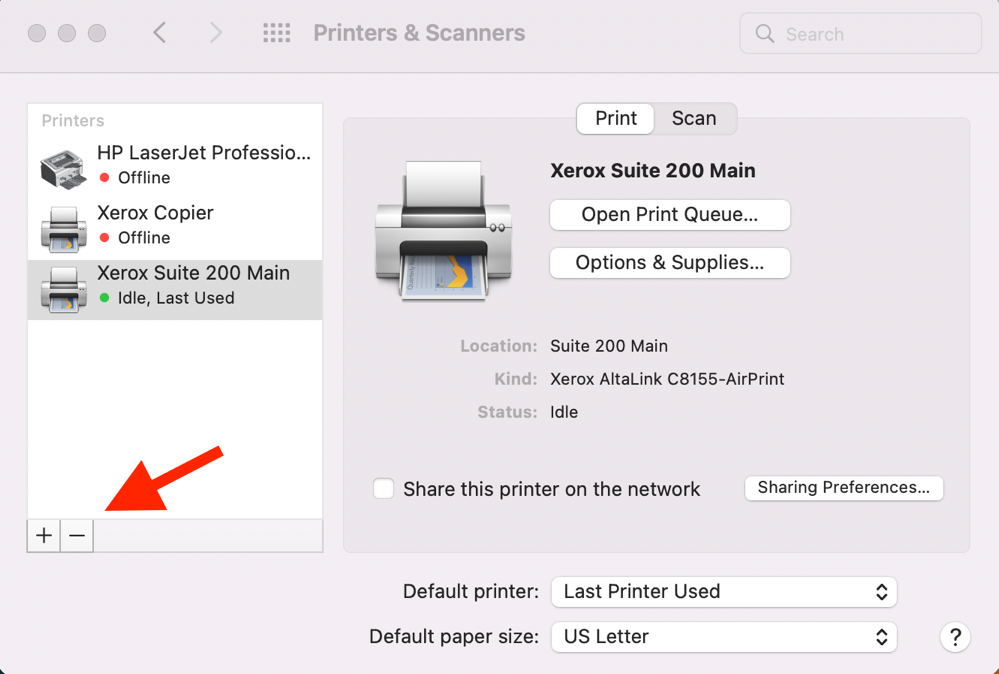
On older Macs, click the minus button in the bottom left corner of the printer window.
Article ID: G.04.03
Last update: 02.28.2025